
Steel pipes are widely used in construction, plumbing, and industrial applications. These pipes can be bent using specialized machines or tools like hydraulic benders and templates. Each method differs in terms of efficiency and the quality of the final bend. This article discusses and evaluates the common techniques for bending steel pipes.
Refrigeration and Air Conditioning:
- Refrigerant delivery pipes
- Condensers and evaporators
- Heat exchangers
Industrial Equipment:
- Industrial refrigeration and heating systems
- Chemical pipelines
- High-pressure transport pipes for industrial use
Automotive Industry:
- Automotive air conditioning systems
- Brake pipes
- Fuel delivery pipes
Home Appliances:
- Refrigeration pipes in refrigerators and freezers
- Heater pipes
- Internal connection pipes in washing machines
Copper pipes are commonly used in household plumbing systems and are also favored in crafting due to their attractive appearance. While copper is a relatively soft material, it’s not soft enough to bend perfectly without the right tools.
Bending copper pipes without specialized equipment can cause the pipe to collapse, leading to uneven edges instead of smooth, uniform curves.
1.0 How to Bend Copper Pipes Without a Pipe Bender
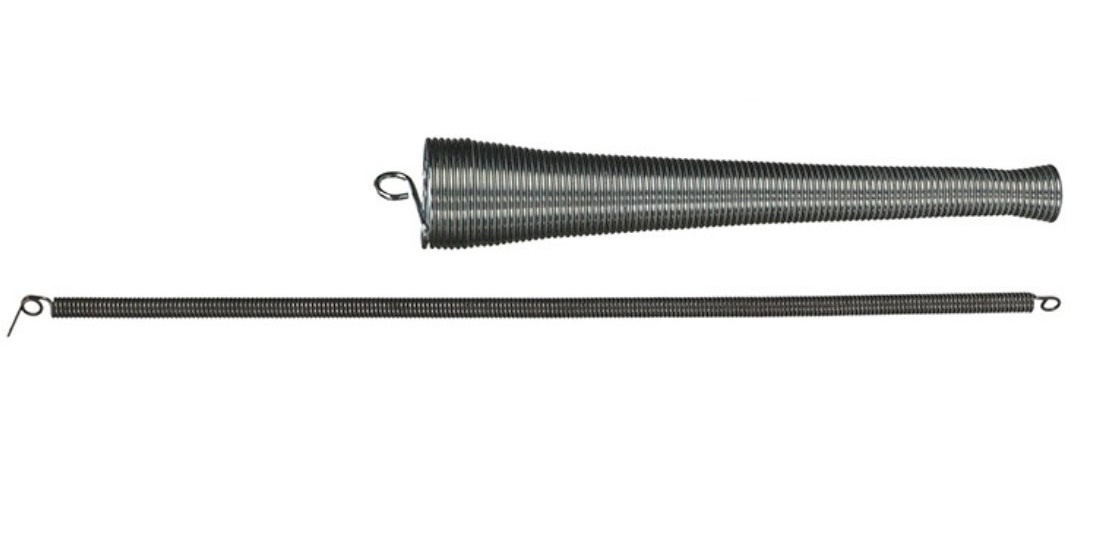
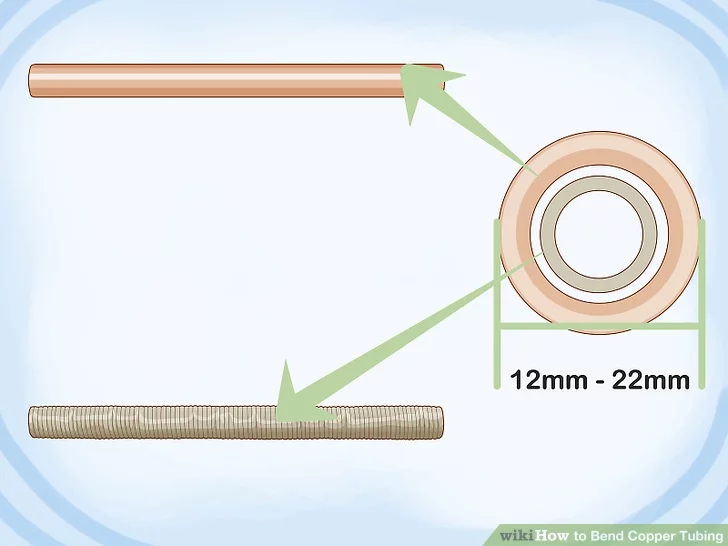
Using a bending spring is the easiest way to bend copper pipes without a pipe bender. A bending spring is a sturdy and flexible spring inserted into the copper pipe (or over the surface). During manual bending, the spring supports the pipe wall. There are two types of bending springs: internal and external.
Internal Bending Springs: These springs are designed to fit inside copper pipes with an outer diameter ranging from 12 to 22 mm. They help prevent the pipe wall from collapsing during bending.
External Bending Springs: These springs are placed over copper pipes with an outer diameter of 6 to 10 mm. They help prevent the pipe wall from expanding outward during bending.
1.1 How to Bend Copper Pipe Using Tube Springs:
- Prepare the Pipe: Clean off any rough edges or burrs at the ends of the copper pipe caused by cutting.
- Mark the Bend Point: Use a permanent marker to mark the point where the bend will be made. Ensure the mark is at the outermost point of the bend radius, which is the minimum radius the pipe can be bent without damage.
- Choose the Correct-Sized Spring: Select a tube spring that fits the pipe’s diameter. Insert the spring inside or around the pipe, depending on the pipe size.
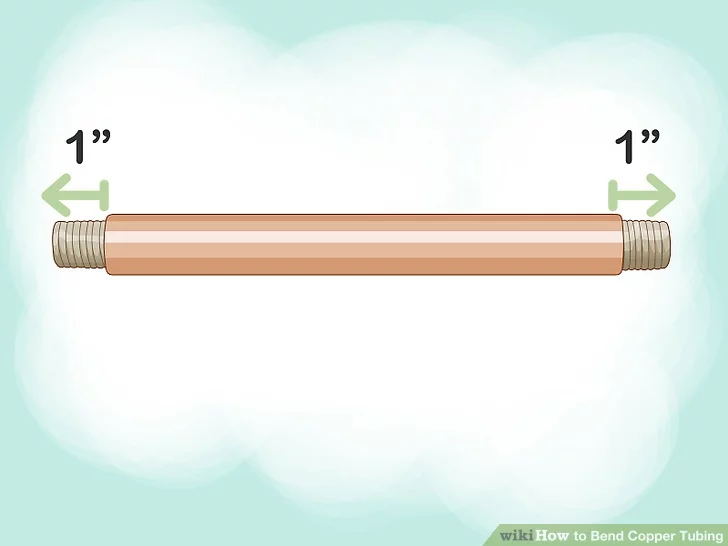
- If the spring is longer than the pipe, it can be easily retrieved after bending.
- If the spring is shorter, attach a wire to the end to assist in removal.
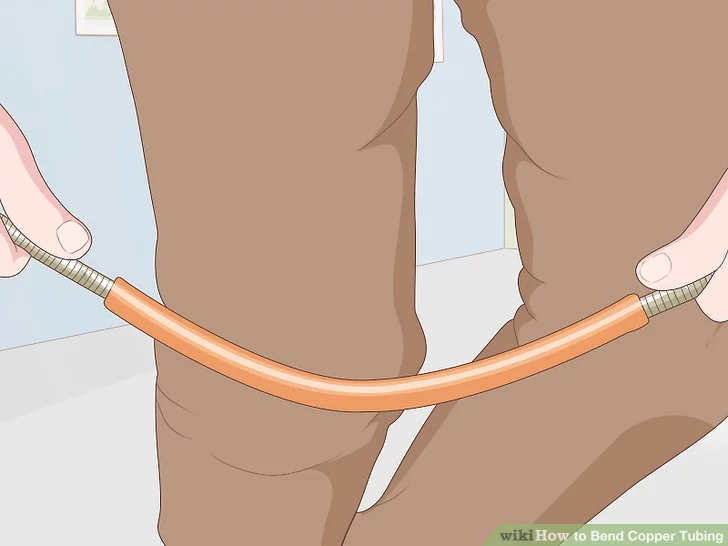
- Pad the Pipe: Wrap the copper pipe with a soft cloth to protect it during the bending process.
- Bend the Pipe: Bend the copper pipe over your knee. Move the pipe back and forth on either side of the knee to ensure a smooth and consistent bend.
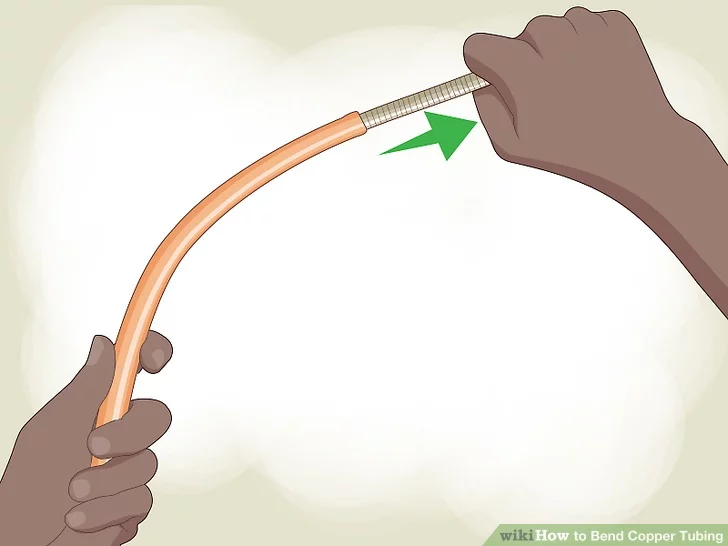
- Remove the Spring: After bending, carefully remove the spring. If it’s difficult to remove, twist it clockwise to release it from the bend.
- Alternative Method: If you overshoot the desired angle, you can bend the pipe past the target angle and then unbend it to the correct position.
- Advantages of Using Tube Springs: Bending copper pipe with tube springs is a cost-effective method compared to using a pipe bender. Springs are easy to store and transport, though different-sized springs are needed for each pipe size.
1.2 How to Bend Copper Pipe Using Sand or Salt
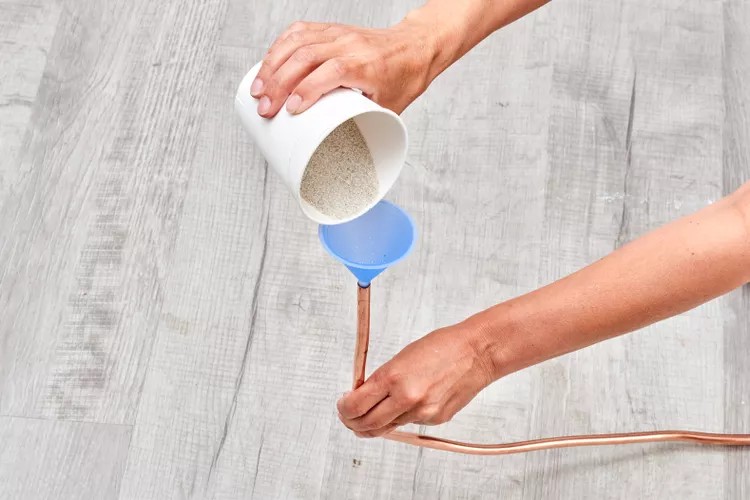

Using dense materials like sand or salt inside the copper pipe can help distribute the bending force evenly, preventing localized pressure that could cause damage. Here’s how to do it:
- Straighten the Pipe: Begin by roughly straightening the copper pipe or tubing. It doesn’t need to be perfectly straight, just enough to allow material to flow.
- Tape One End of the Pipe: Use duct tape or electrical tape to seal one end of the copper pipe.
- Fill the Pipe: Fill the copper pipe with sand or salt using a funnel.
- Tape the Other E n: Seal the other end of the pipe with tape to hold the filler material inside.
- Bend the P IP e: Bend the pipe to the desired curve. The sand or salt will help prevent the pipe from collapsing while being bent.
- Remove the Tape and Filler:
Once the bending is complete, remove the tape and let the sand or salt flow out of the pipe.
1.3 How to Bend Copper Pipe Using a Blow Torch
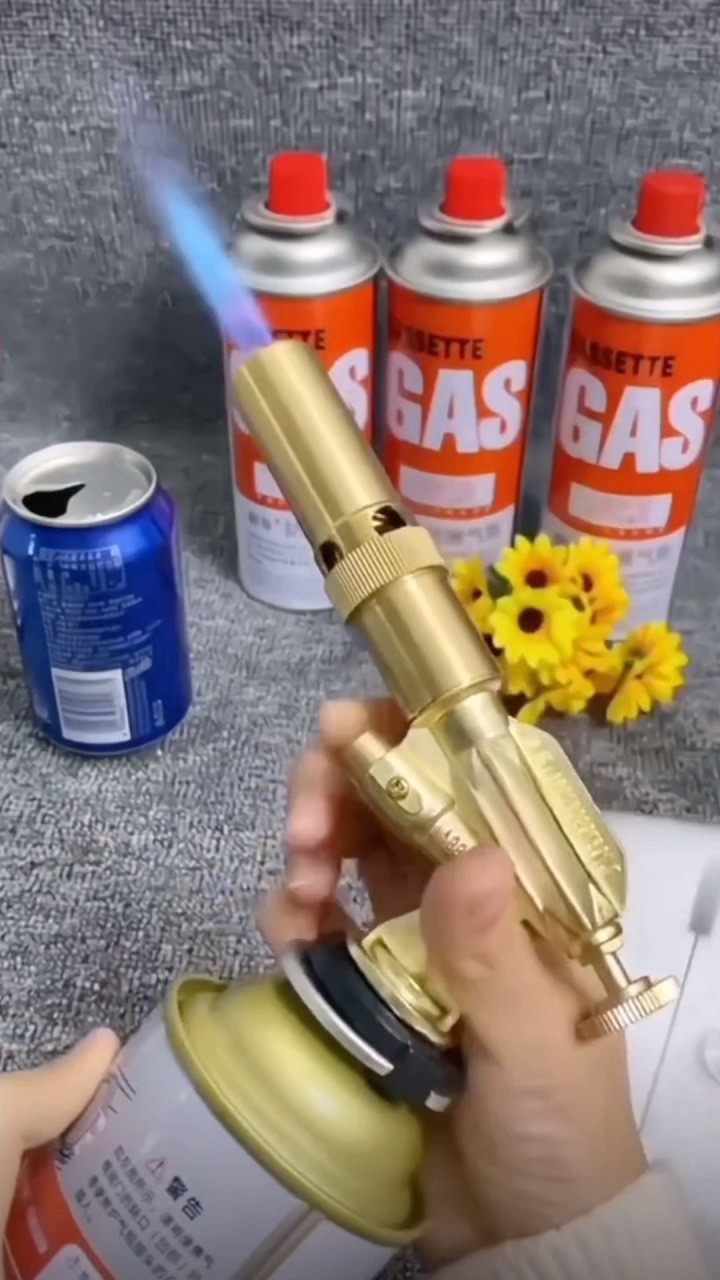

Copper pipes can be easily heated and bent using either a small butane torch or an oxy-acetylene torch. While a butane torch takes longer to heat the pipe to the required temperature, an oxy-acetylene torch heats the copper to red-hot quickly, making it ideal for bending multiple pipes.
Here’s how to bend a copper pipe with a blow torch:
- Mark the Bend Location: Determine where you want to bend the pipe and mark the spot.
- Secure the Pipe: Fasten the pipe to a steady surface, such as a table. If using a wooden table, ensure the section to be heated is away from direct contact with the table.
- Heat the Pip: Use the blow torch to heat the pipe evenly until it becomes red-hot.
- Cool the Ppipe Let the pipe cool down until it is safe to touch.
- Bend the Pi pe: Hold the pipe firmly and bend it to the desired angle.
- Repeat for Additional Be nds: For further bends, repeat steps 2 through 4.
Tip: Adding sand to the copper pipe after it cools and before bending can help prevent kinks from forming during the process.
1.4 How to Bend Copper Pipe Using a Vice
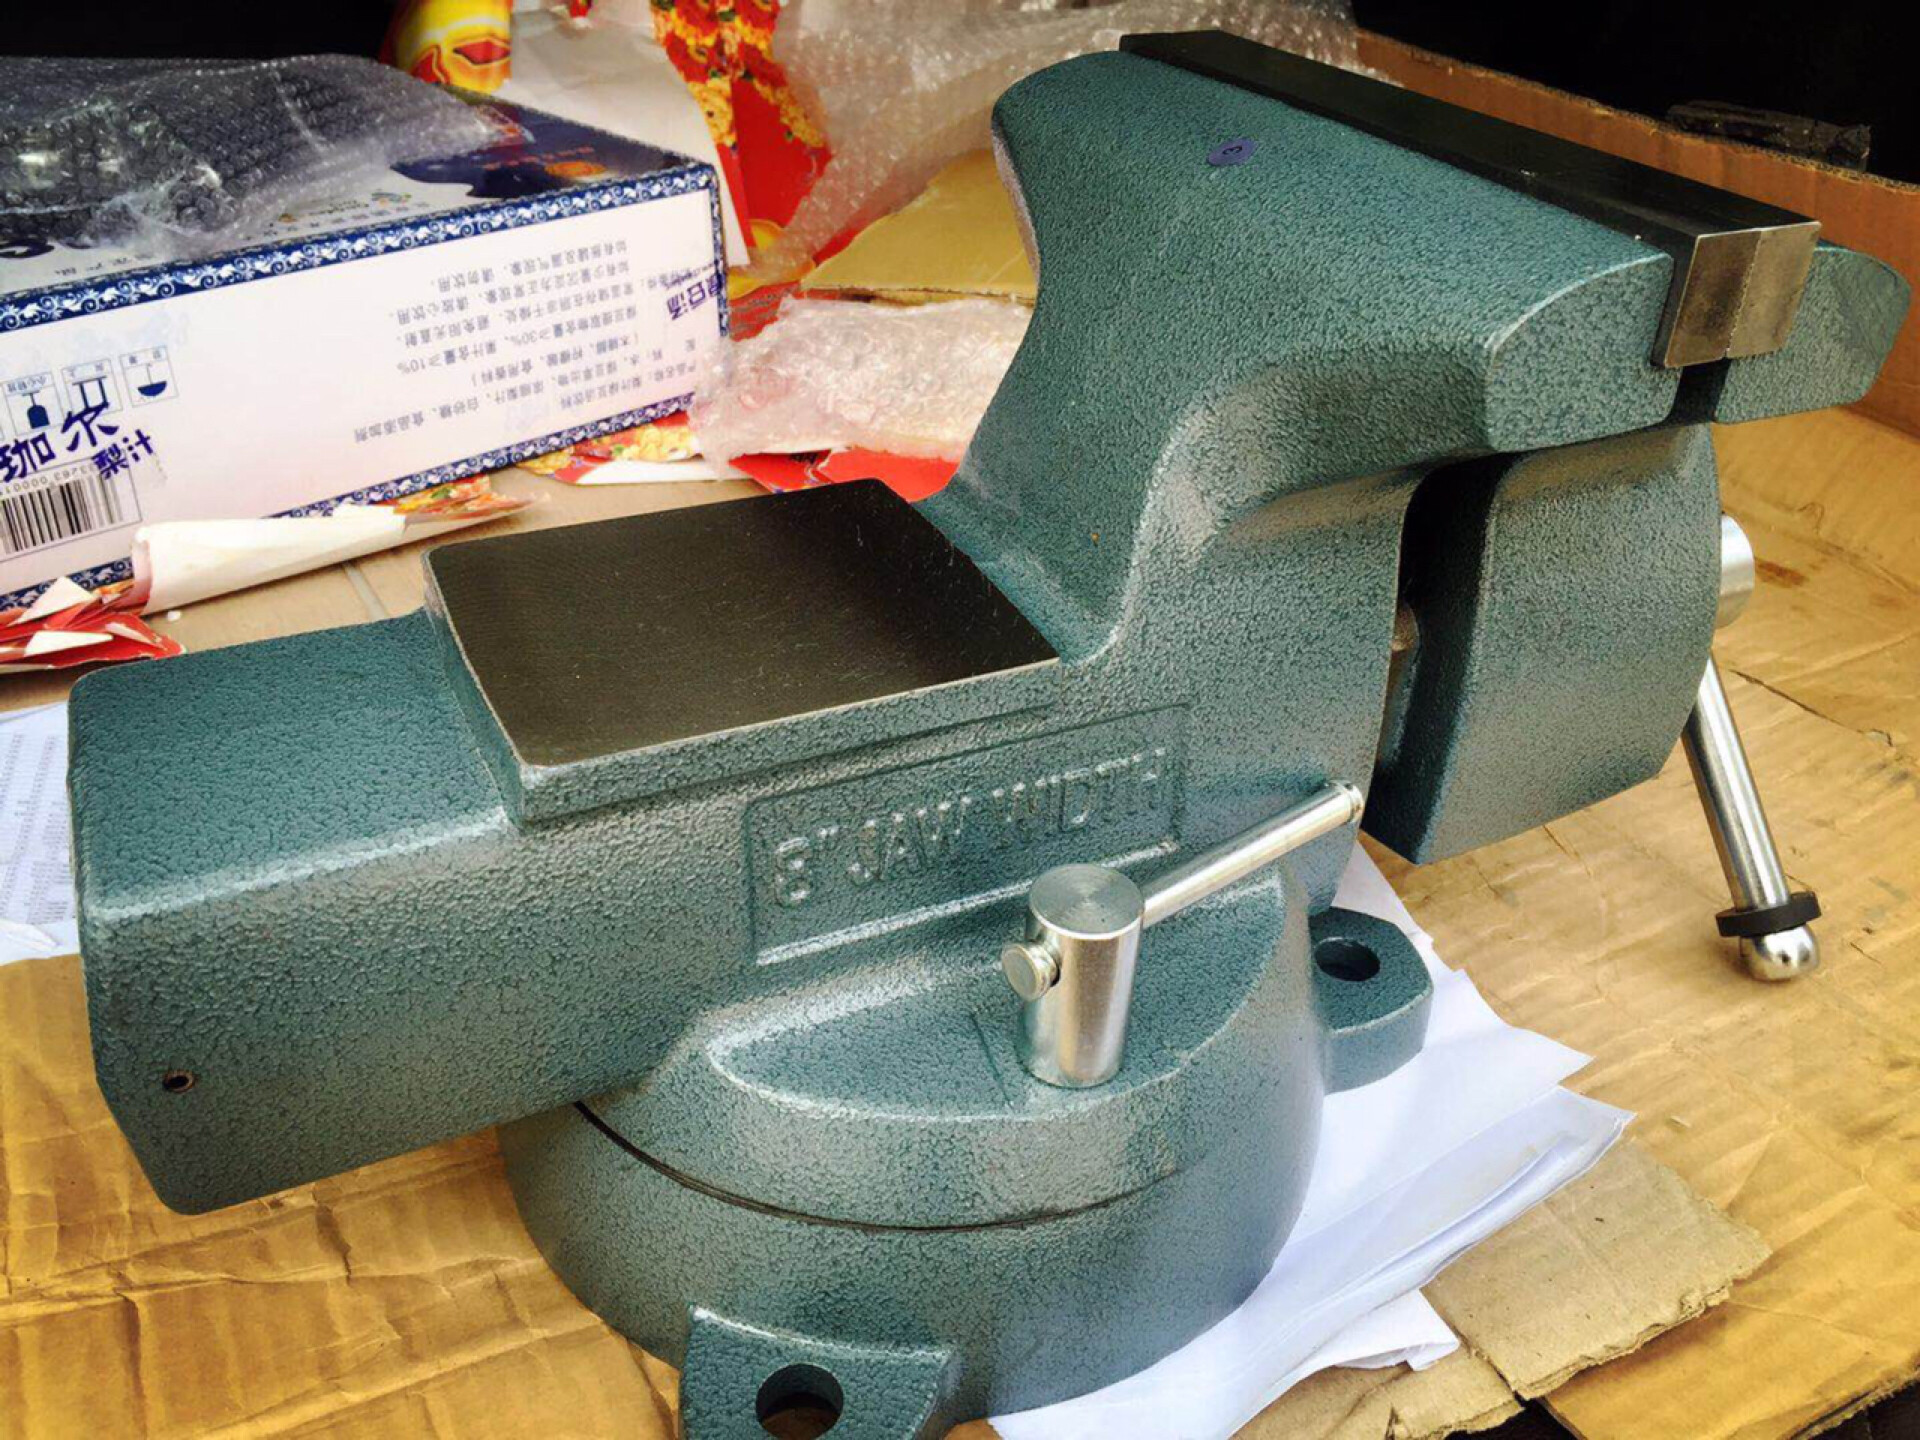
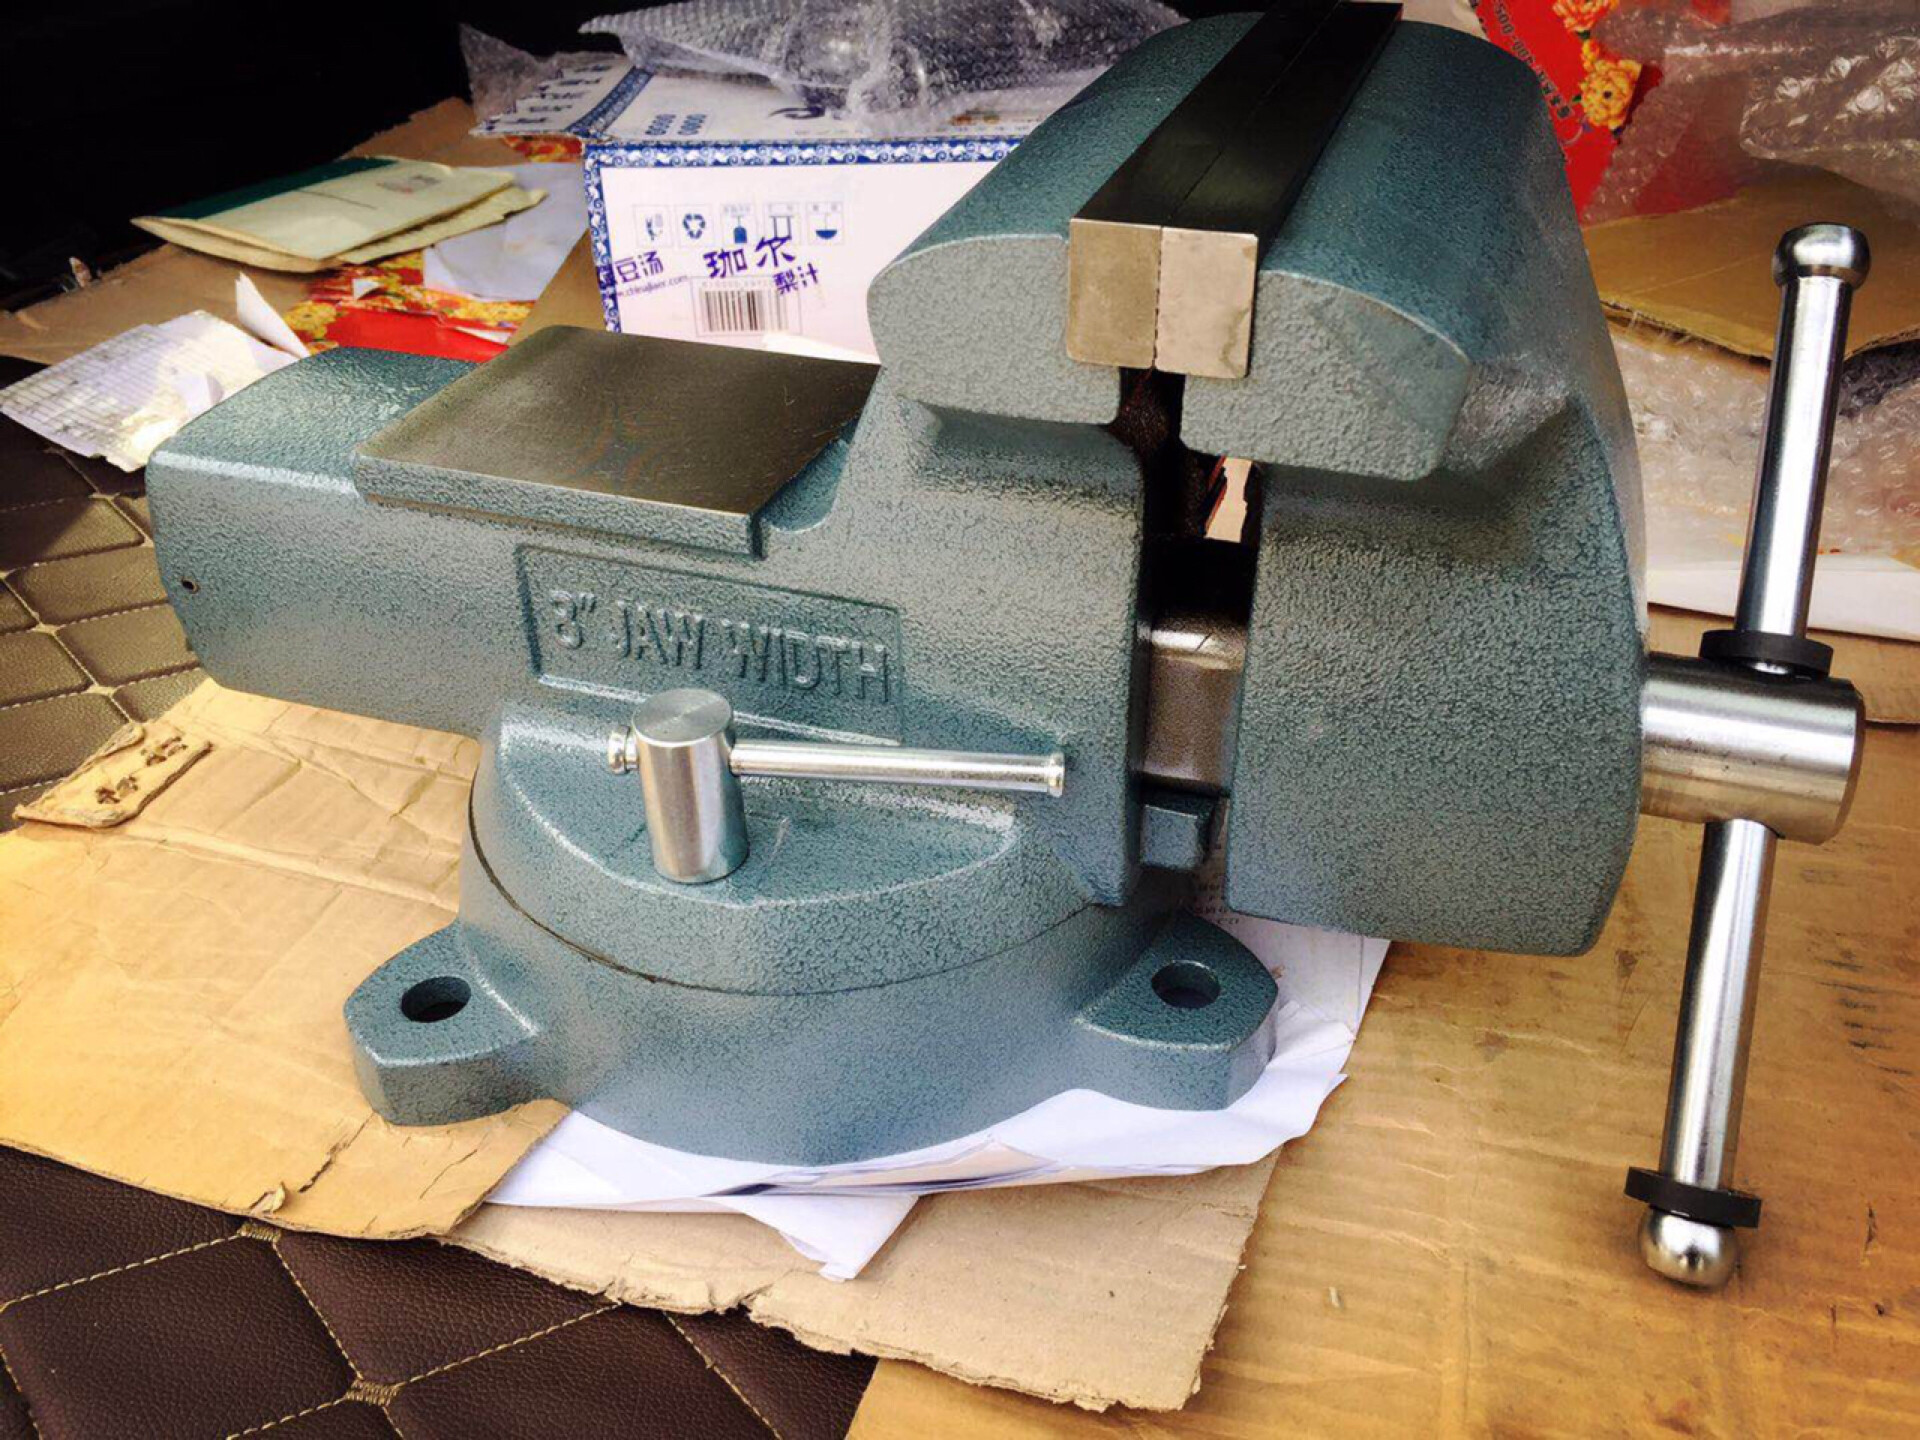
Follow these steps to bend a copper pipe using a vice:
- Heat the Pipe He at the copper pipe evenly along its length until it becomes red-hot.
- Position the Pipe in the Vice: Quickly place the heated pipe into the vice and tighten it just enough to make contact with the pipe.
- Bend the Pipe While the pipe is still hot, pull both ends upward to achieve the desired angle. The vice will support the pipe ends, preventing them from collapsing during the endnote:
This method is simple since only a vice is required, but it can be tricky. Skill and quickness are essential to achieve a smooth and accurate bend.
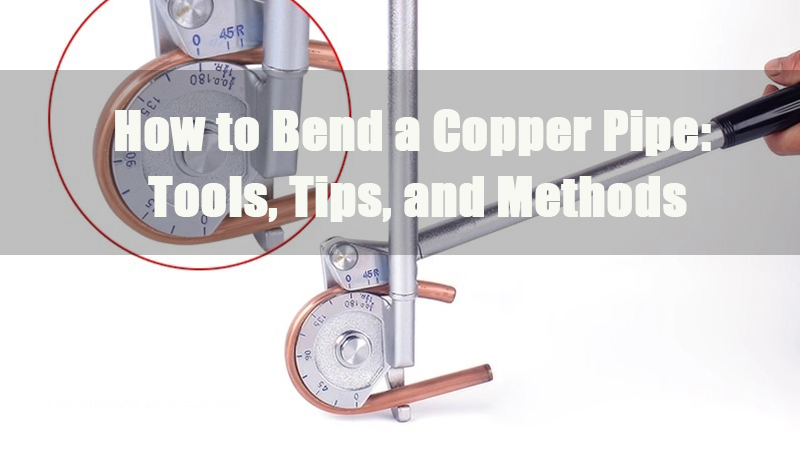
2.0 How to Bend Copper Pipe Using a Pipe Bender
Pipe benders come in various types, from simple manual devices to high-precision CNC systems, catering to diverse needs from home projects to industrial production.
- Manual Pipe Bender
- Bow-Type Pipe Bender
- Bench-Top Pipe Bender
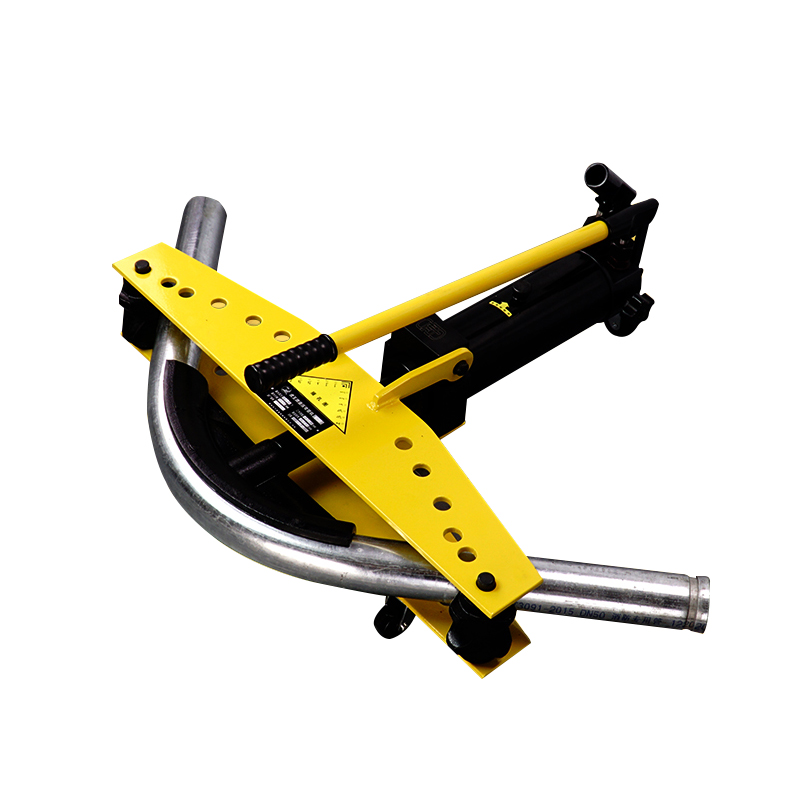
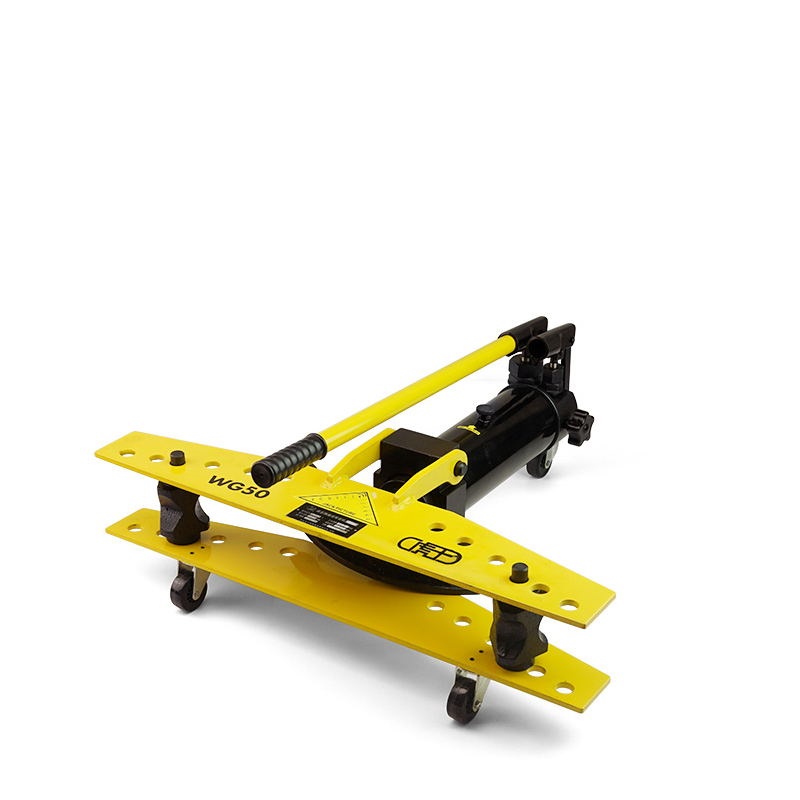
- Hydraulic Pipe Bender
- Electric Pipe Puller
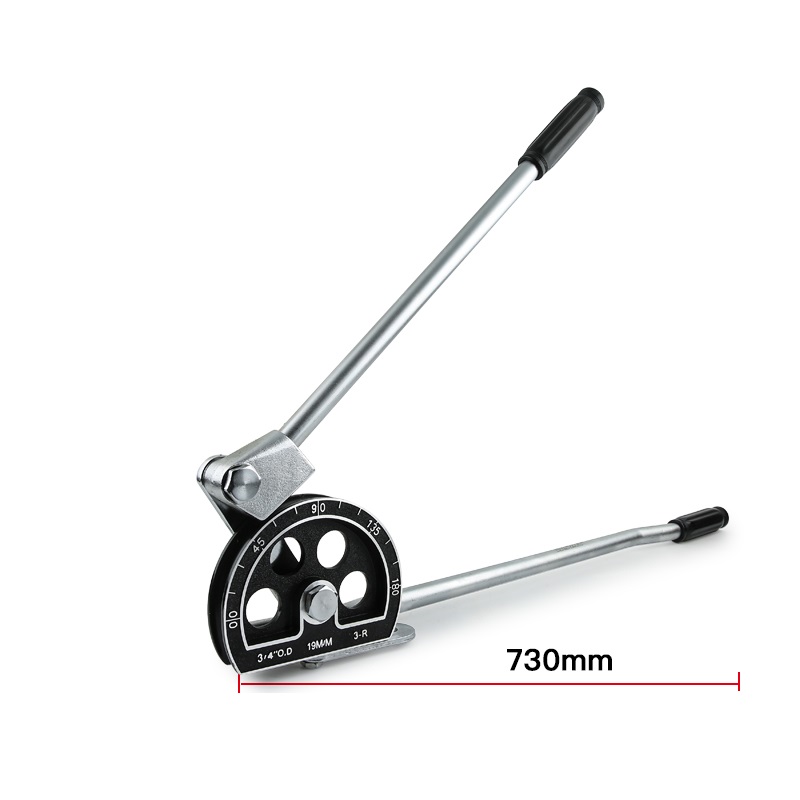
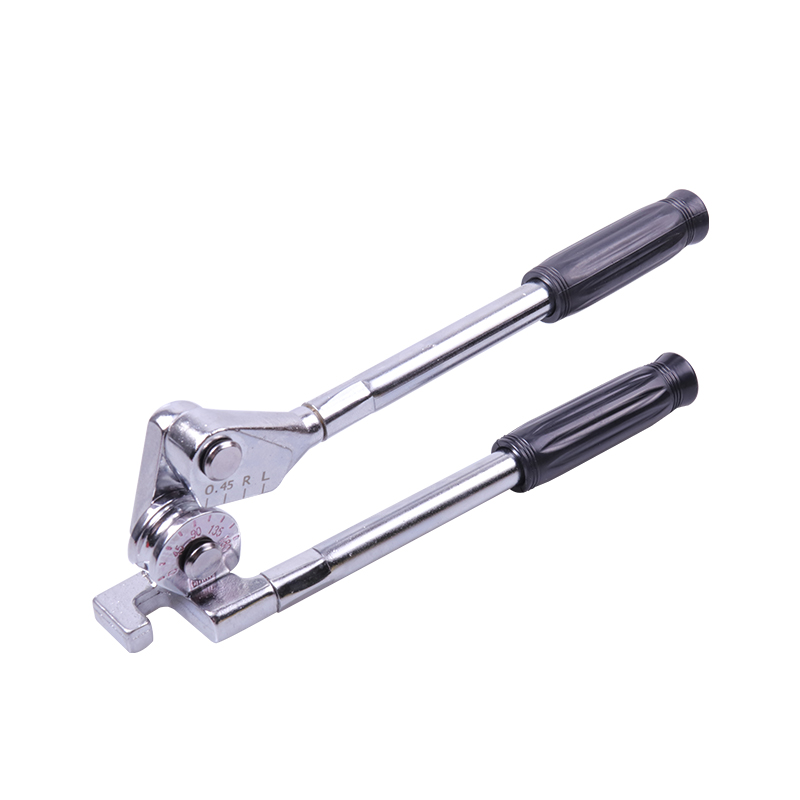
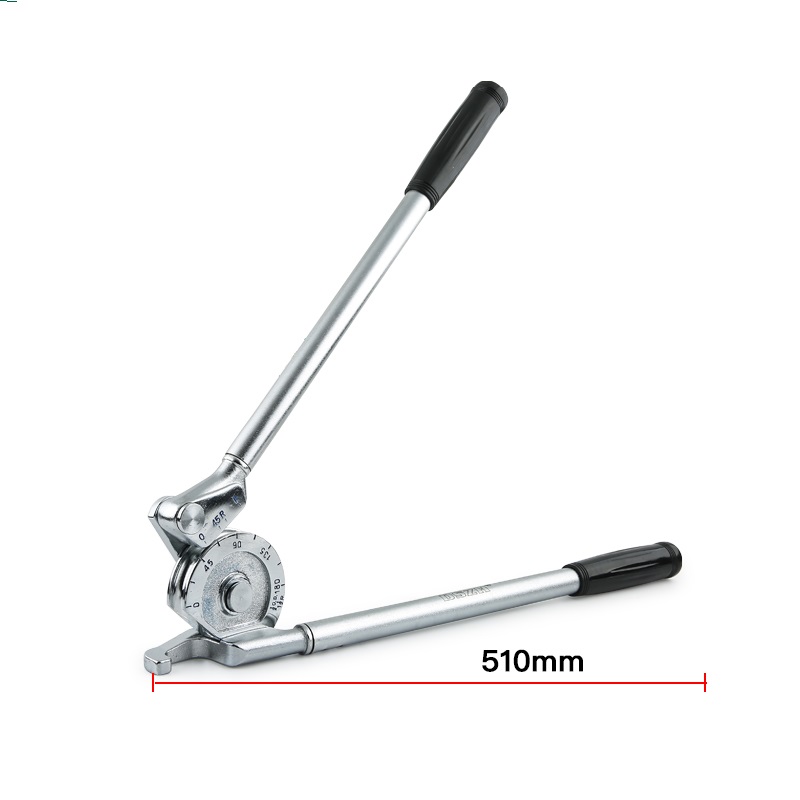
- Lever Pipe Bender
- Electric Pipe Bending Machine
- CNC Pipe Bending Machine
2.1 How to Bend Copper Pipe Using Lever Type Tube Bender:
Step 1: Open the Pipe Bender Handles
Fully extend the handles of the pipe bender. Lift the short handle until it forms a 180-degree angle with the long handle, which you’ll hold during the bending process. This will create enough space to insert the tubing and set the bend radius.
Step 2: Disengage the Tube Latch
Press down on the grooved thumb section of the tube latch to release it. Most models require the latch to be disengaged before inserting the tube. The latch may function as a hook that swings over the tube once it’s in place.

Step 3: Mark the Tube for Bending
Use a felt-tip marker to mark the tube at the point of the bend. You can use a ruler or measuring tape to ensure precise placement of the bend. Marking the tube helps you maintain accurate alignment, especially if making multiple or compound bends.
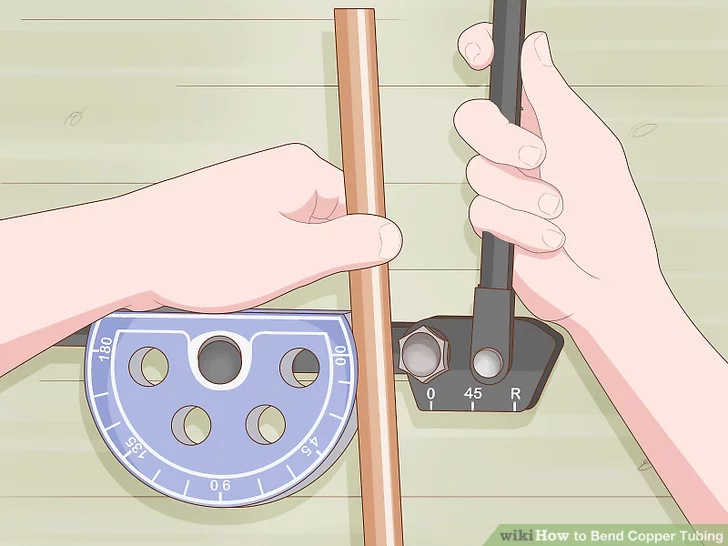
Step 4: Insert the Tube into the Bender
Insert one end of the tube into the slot between the handles, ensuring it is aligned with the rounded bender die. Feed the tube until the marked section rests on the die.
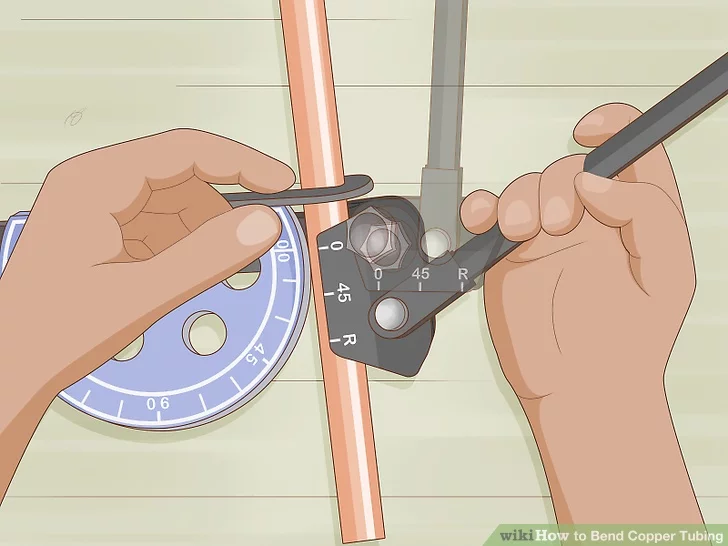
Step 5: Secure the Tube Latch
Flip the latch back over the tube until it clicks into place, securing the tube. The latch holds the tube steady while you make adjustments.
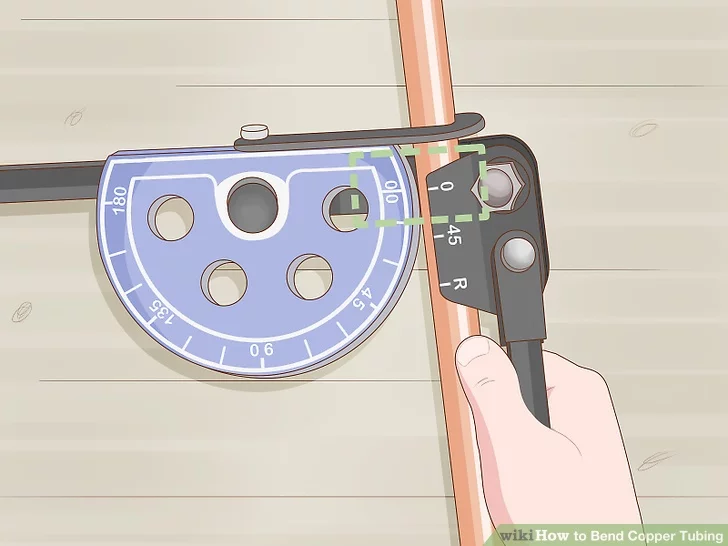
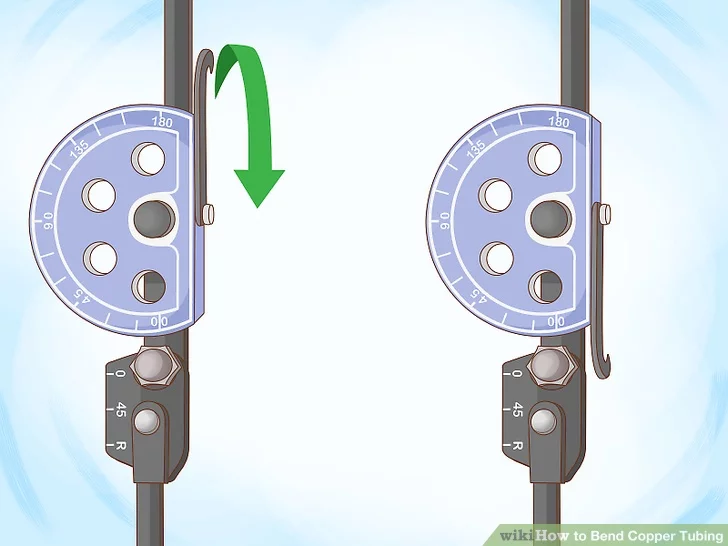
Step 6: Align the Bend Point with the Desired Radius
Adjust the tube so the marked bend point aligns with the corresponding bend radius on the die. Ensure the markings on the tube and the bender faceplate match up, particularly the ‘0’ on the roll support and die faceplate.
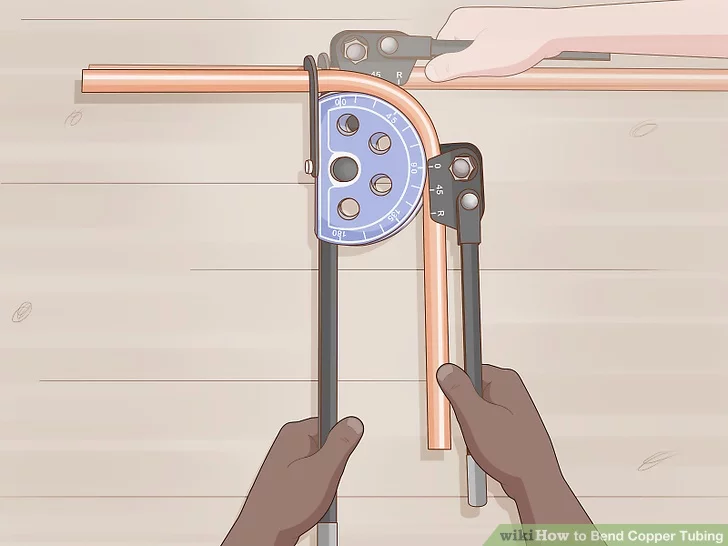
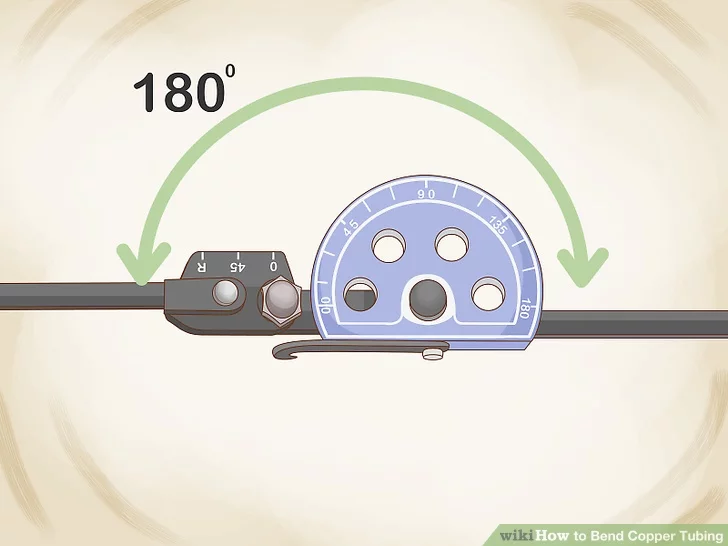
Step 7: Bend the Tube
Close the handles by pressing down on the short handle while holding the long handle steady. The tube will smoothly bend around the die. Stop when the ‘0’ on the roll support reaches the desired bend radius. Raise the short handle to remove the tube.
2.2 How to Bend Copper Pipe Using Ratcheting Tube Bender:
This tool is designed for bending soft copper tubing with an OD range from 3/8” to 1 1/8”.
- Step 1: Select the appropriate mandrel and cross-section that match the tubing’s OD. For example, use a ¾” mandrel and a ¾” cross-section for ¾” OD copper tubing.
- Step 2: Secure the mandrel in place, ensuring it moves smoothly during ratcheting.
- Step 3: Attach the cross-section to the bolt and tighten it with the wing nut.
- Step 4: Mark the tubing where the bend should occur, e.g., 9” from the left.
- Step 5: Insert the tube into the tool, aligning the mark with the correct line on the mandrel. There are two lines on the mandrel—one to the left and one to the right of the white numbers.
- Step 6: The mark should align with the line farthest from the tube’s existing end.
- Step 7: Ratchet the mandrel until the tubing reaches the desired angle.
- Step 8: Use a right-angle measuring tool to verify the bend is 90 degrees and that the tube is positioned at the correct distance (e.g., 9” from the left).
2.3 How to Bend Copper Pipe Using Electric Pipe Bending Machine:
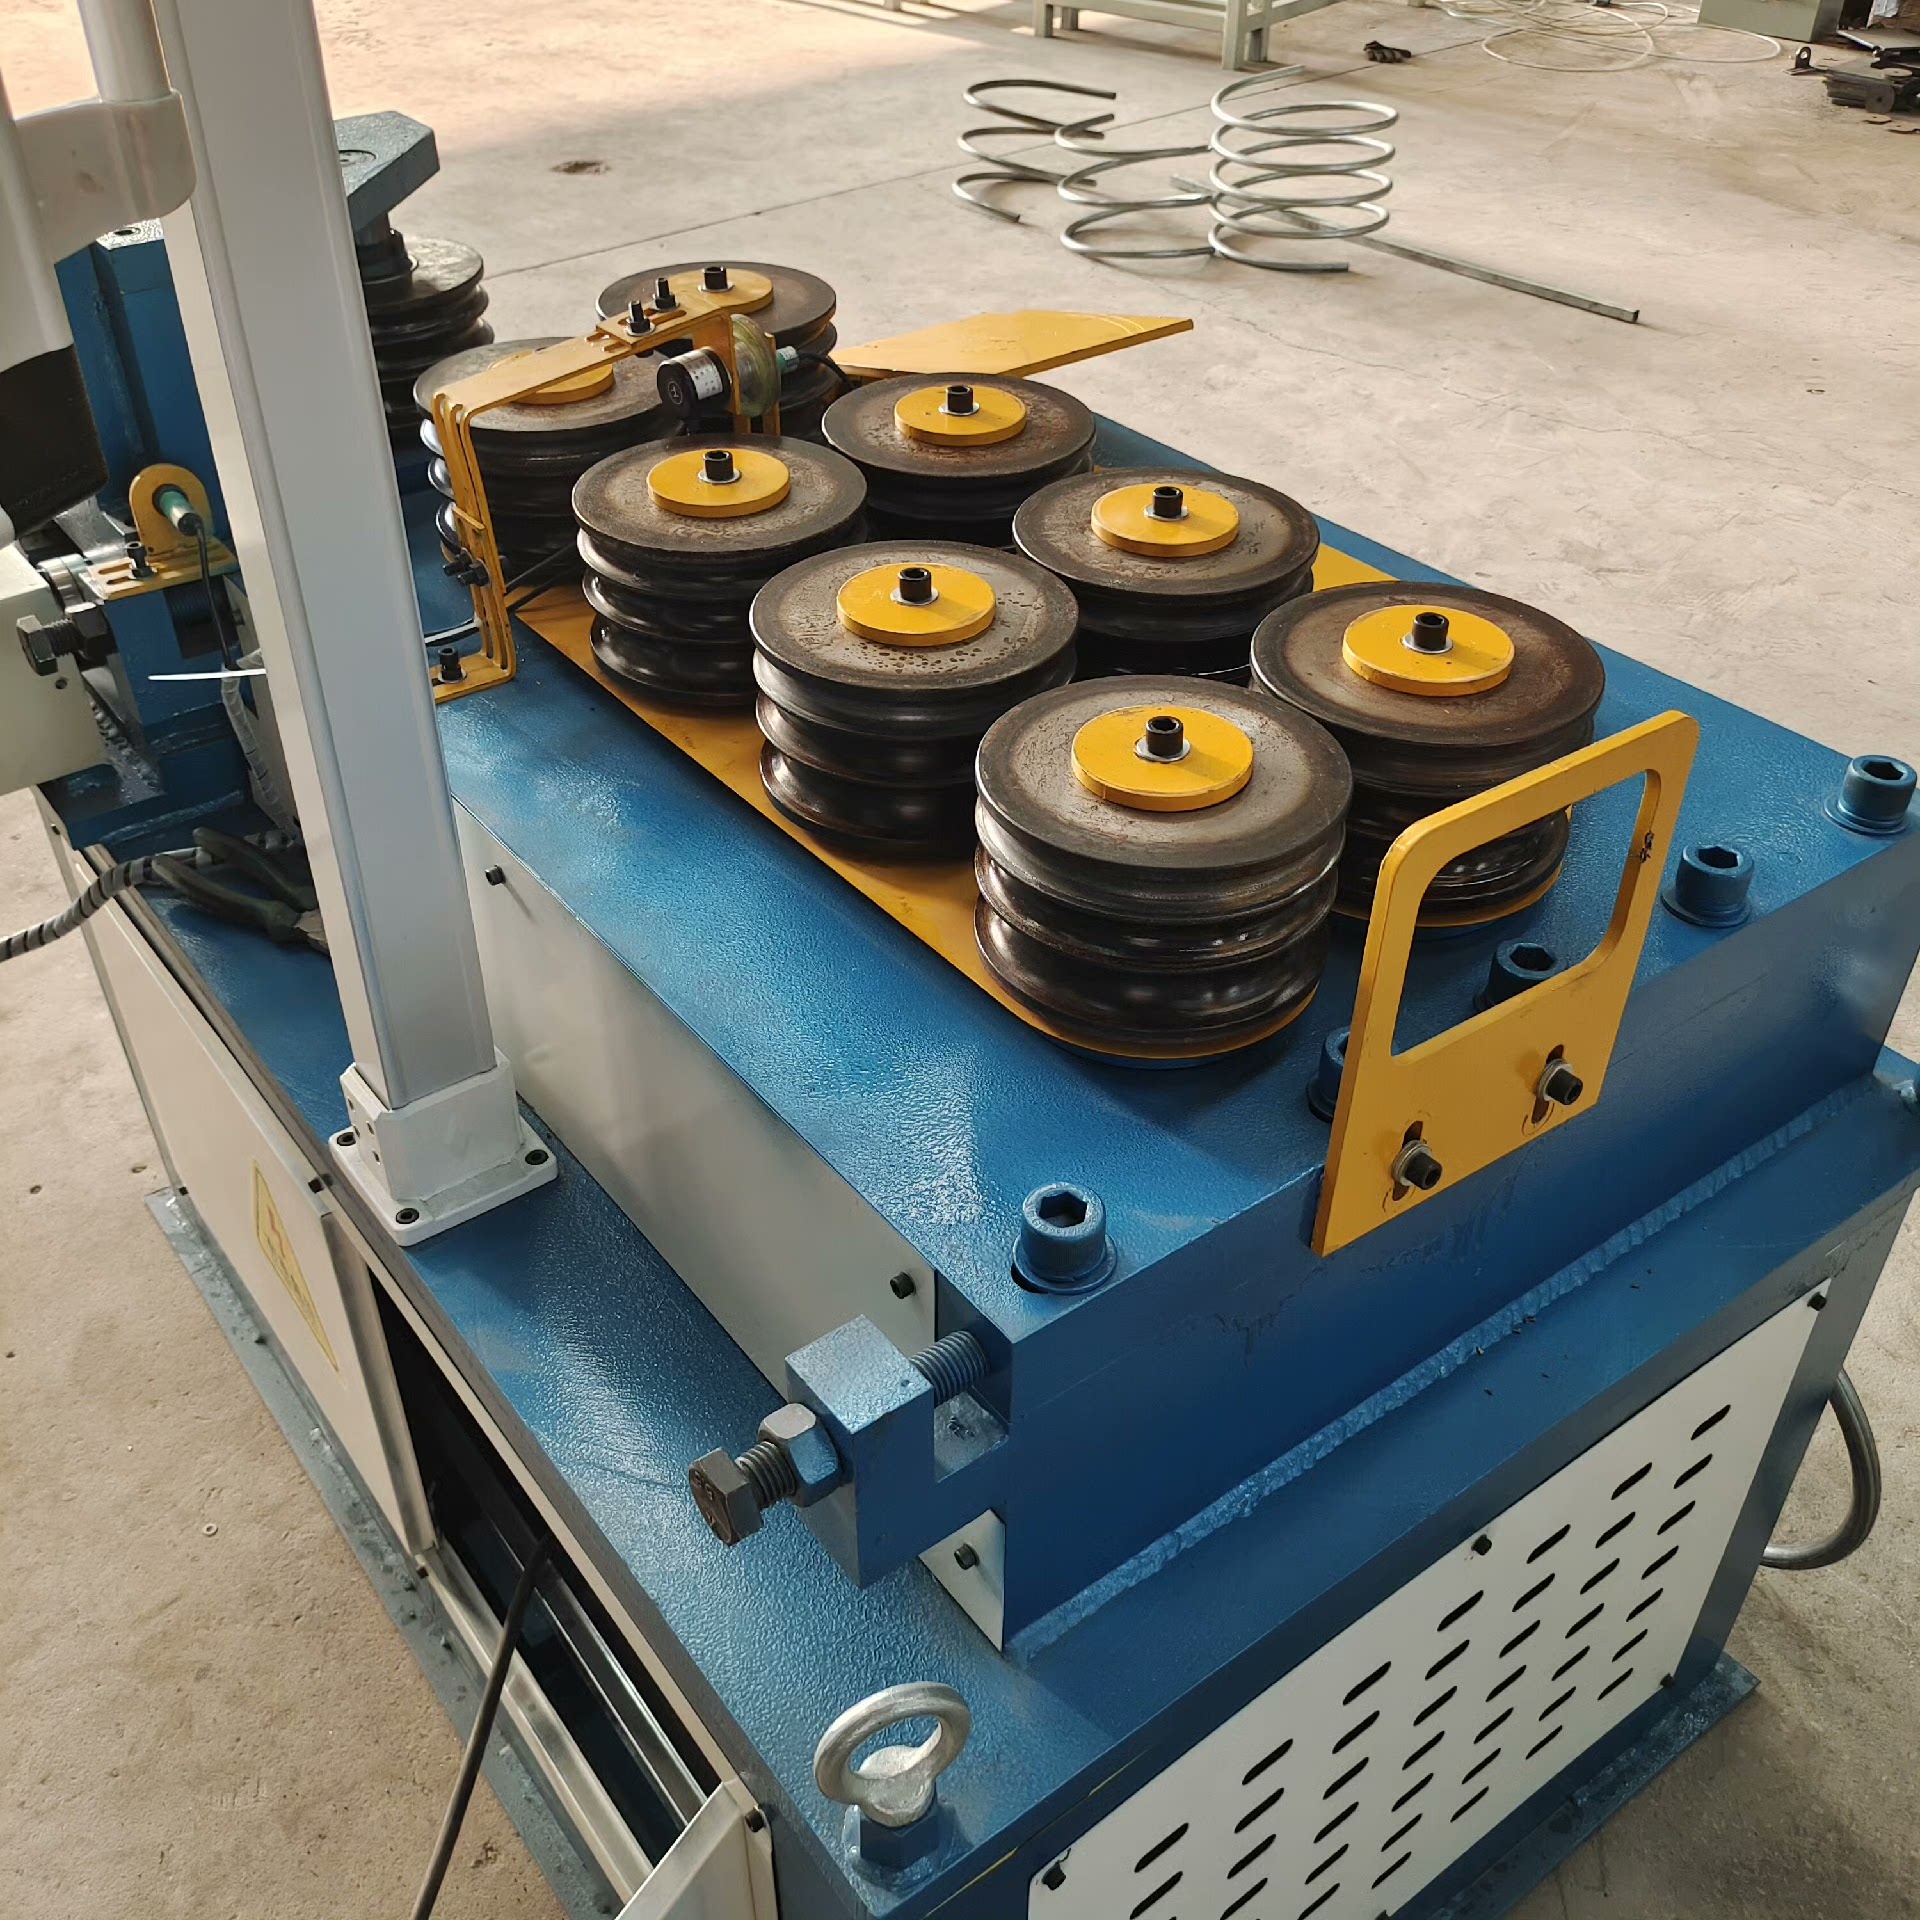
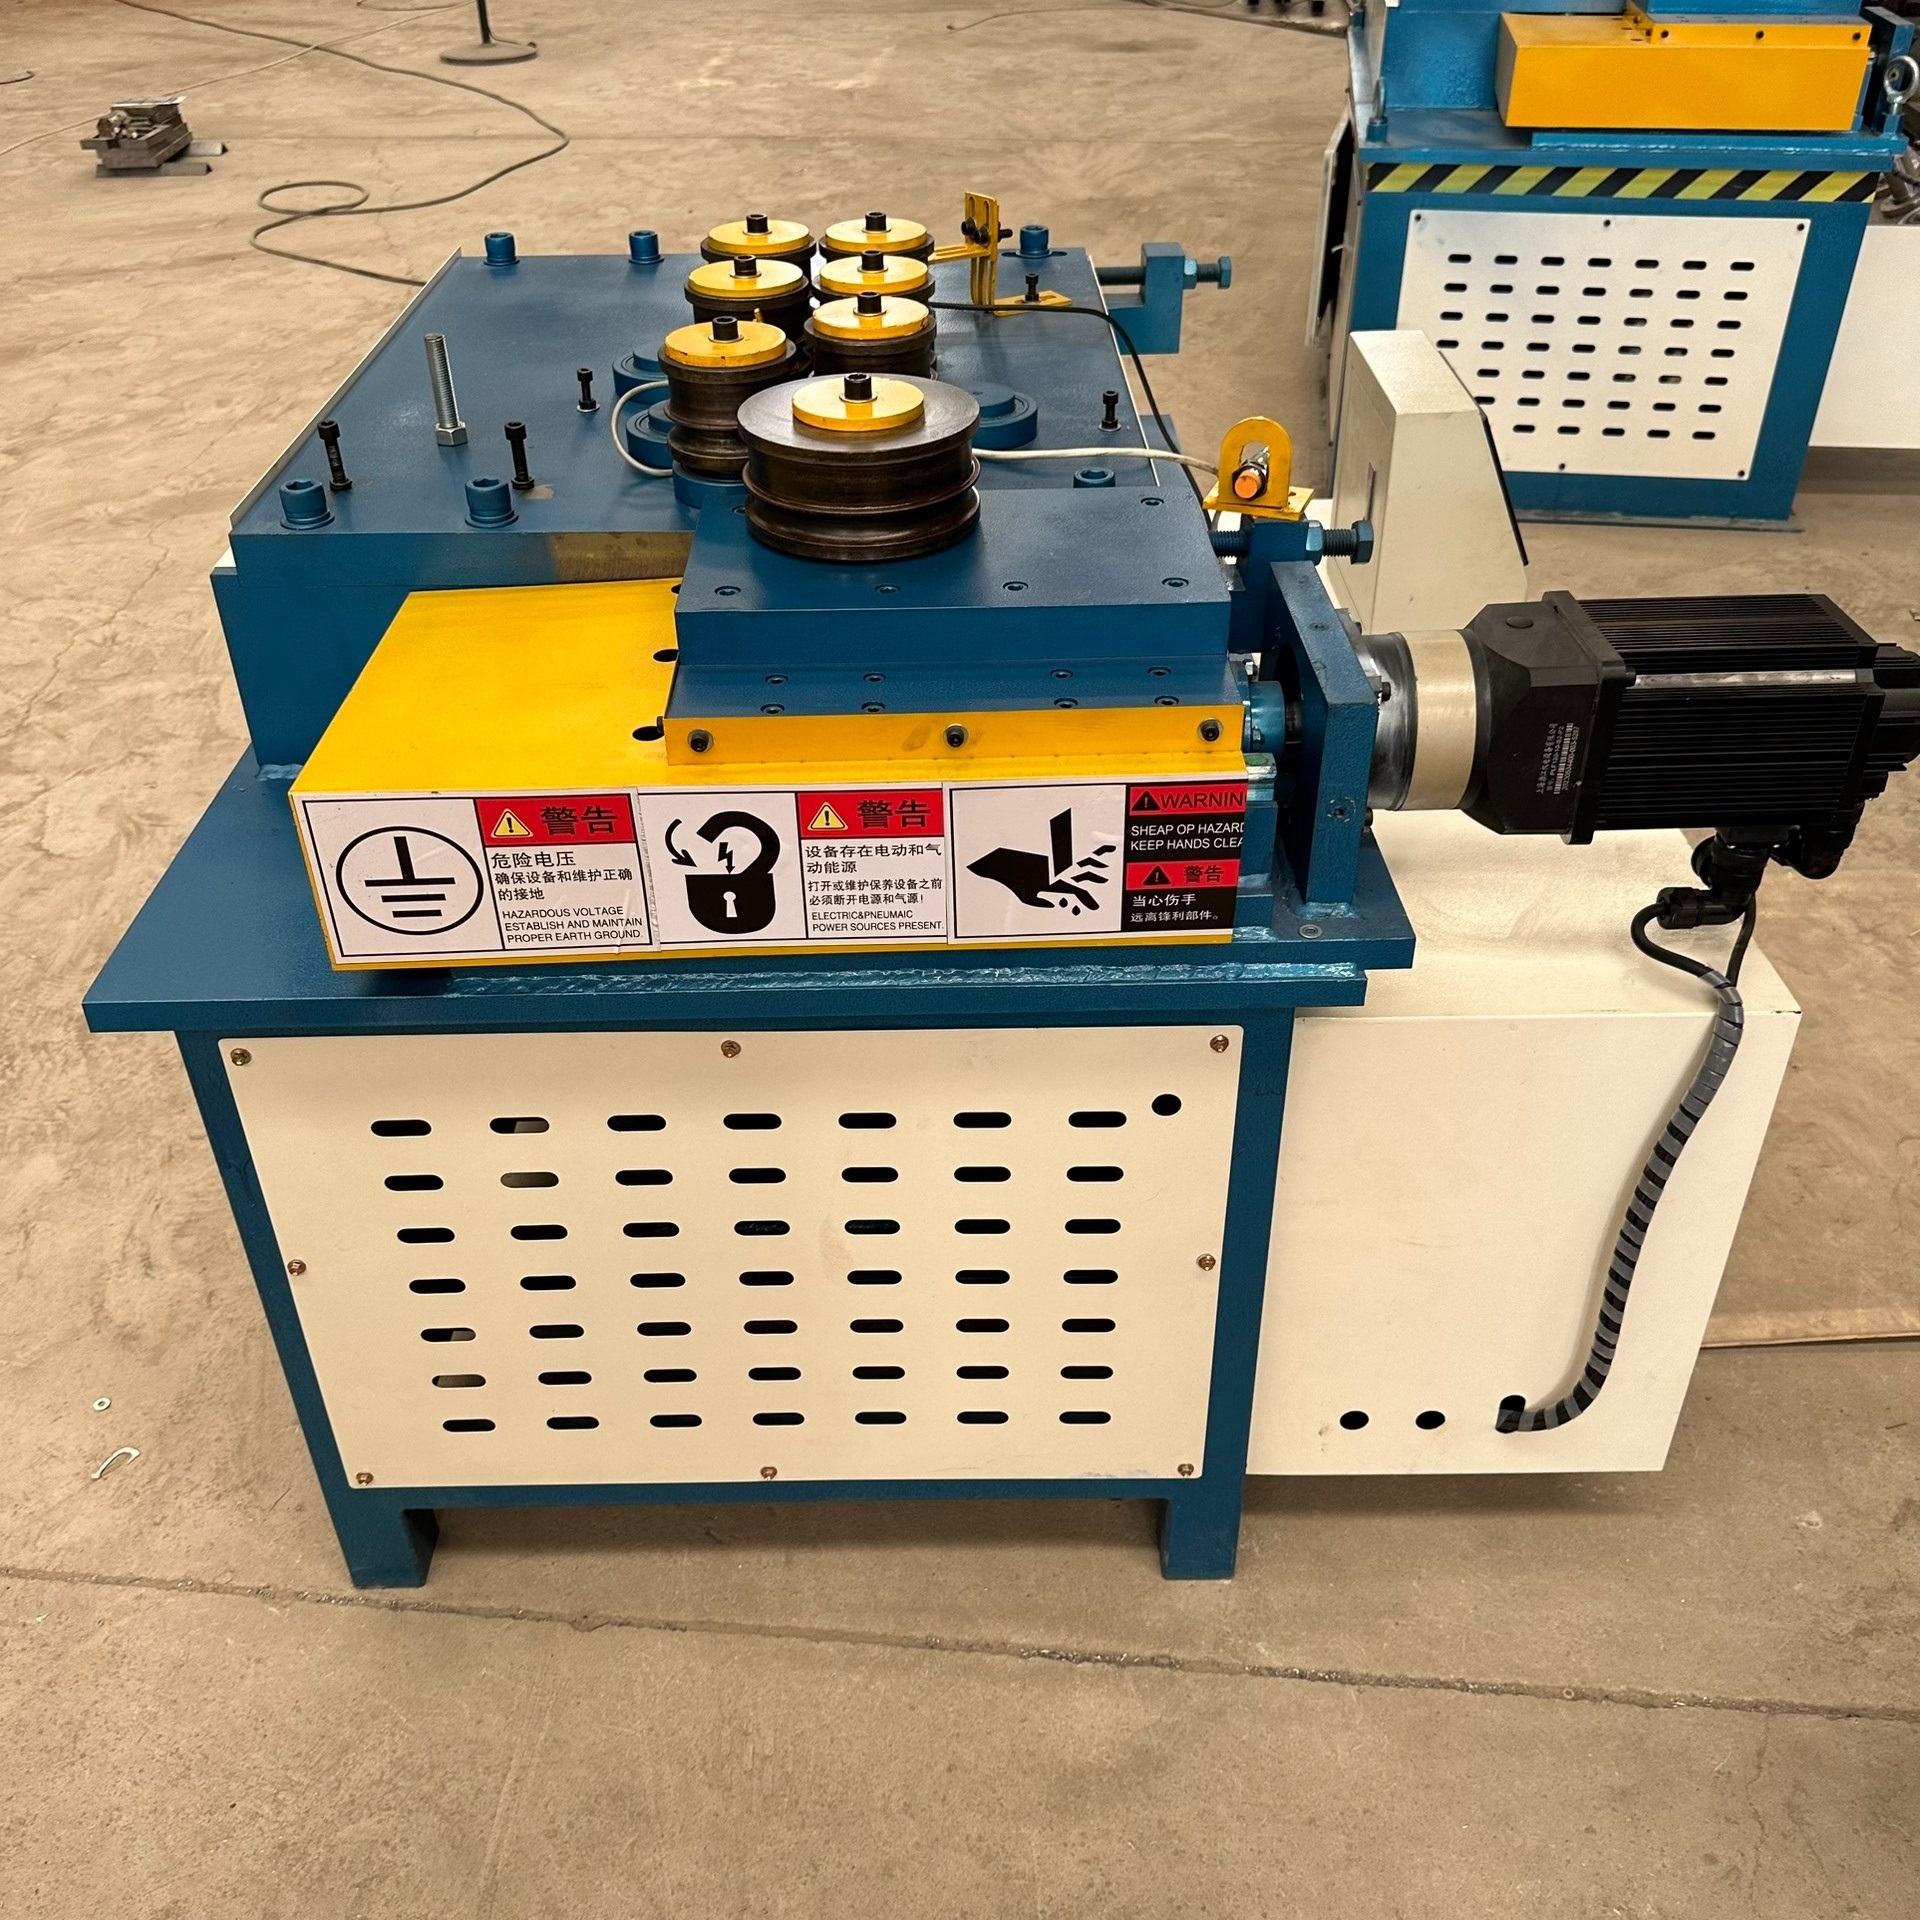
- Preparation: Ensure the bender is securely mounted and check the power supply and all components.
- Select Dies and Rollers: Choose the correct dies and rollers for the pipe size and material, and install them securely.
- Measure and Mark the Pipe: Measure and mark the bending points on the pipe, ensuring accuracy.
- Load the Pipe: Place the pipe into the bender, aligning it properly with the die.
- Adjust Bending Parameters: Set the desired bending angle, radius, and speed.
- Start the Bending Process: Turn on the machine and initiate the bending by pressing the button or lever.
- Monitor the Bending: Watch the process to ensure the pipe bends smoothly without distortion.
2.4 How to Bend Copper Pipe Using CNC Pipe Bending Machine
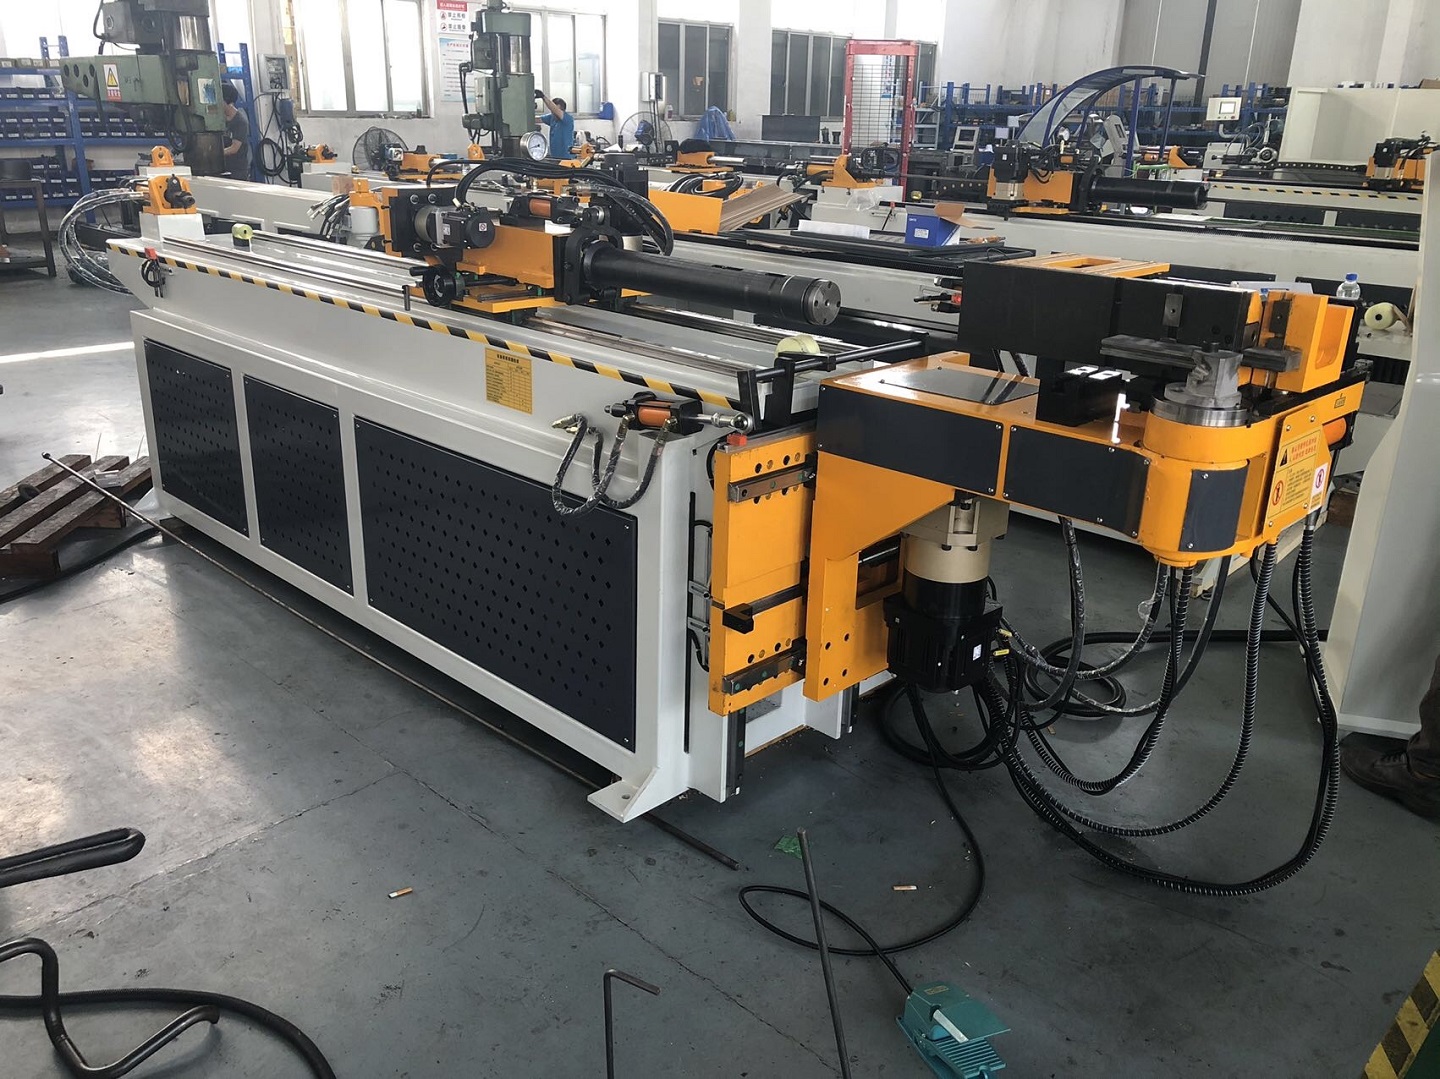

- Preparation Stage: Select the appropriate bending die and install it on the CNC pipe bender, ensuring it’s secure and precise. Clean and lubricate the die for smooth processing.
- Startup and Parameter Setup: Turn on the CNC pipe bender, and activate the hydraulic and control systems. Enter the required parameters (bend angle, radius, feed length, etc.) in the CNC system, paying special attention to bending speed, pressure, and clamping force to avoid deformation or breakage of the copper pipe.
- Clamping the Copper Pipe: Align the copper pipe with the die’s centerline, ensuring the position is accurate (error ≤ ±0.5mm). Apply the correct clamping force to secure the pipe without causing deformation.
- Trial Bend and Adjustment: Perform a trial bend and check the bend angle, radius, and shape. If there are any deviations, adjust the CNC system settings until the trial bend meets the required standards.
- Production Bending: Once the trial bend is successful, begin mass production. Monitor the bending process and adjust parameters as needed to ensure smooth operation.
- Completion: After bending is complete, stop the machine and turn off the systems. Carefully release the clamping and remove the pipe, avoiding any surface damage.
References:
https://www.wikihow.com/Bend-Copper-Tubing
https://tameson.com/pages/how-to-bend-copper-pipe#_bdkbe8ch8nq